10.30.2009

Need a hand? How about an eyeball?

Happy Halloween! I was going to make cat ears, but that seemed too time consuming, and I was feeling much too lazy at the end of the day yesterday. I wanted something fast. So, my mom suggested I just make a big eyeball. Okay. One big eyeball coming up. This doesn't take long to make at all. You can download and print my pattern here. It prints on a standard 8 1/2 x 11, letter-sized piece of paper.
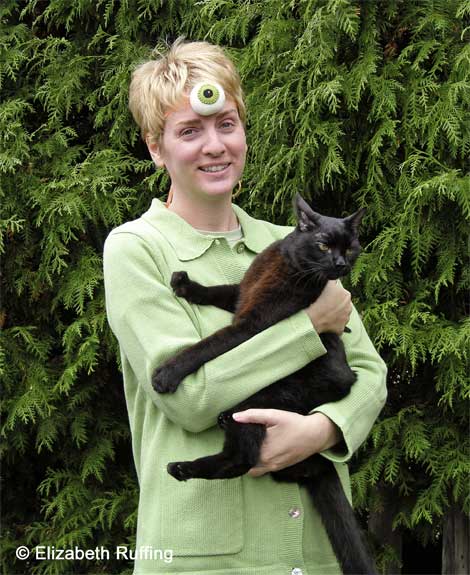
You can wear it in the middle of your forehead as a third eye,
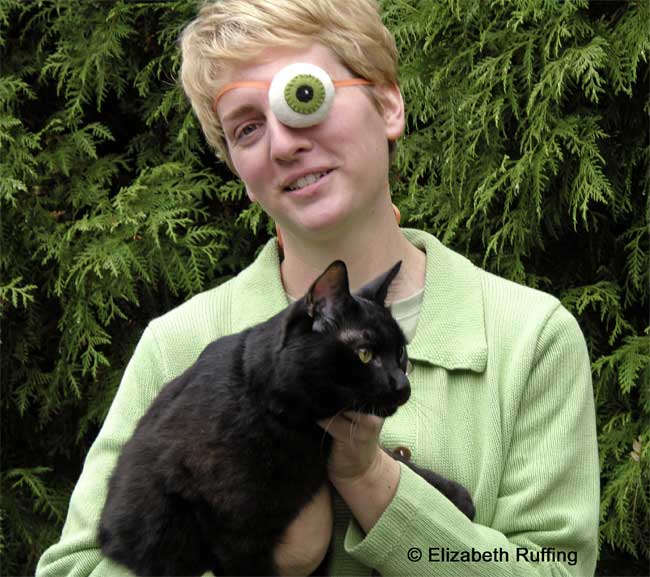
and it works pretty well as an eye patch. You could also attach it to a headband, a bandanna, a gauze bandage, or, who knows, it might look nice pinned to your sweater.
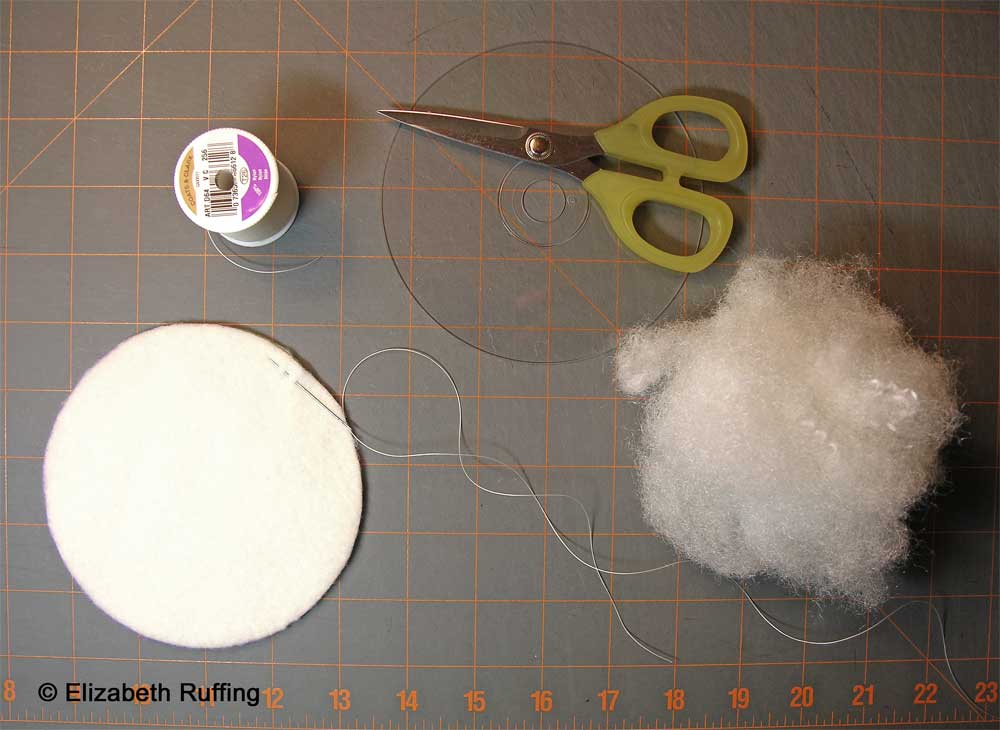
There are only three pieces. The largest is the size of a CD, and that's the eyeball itself, or the white of the eye. The other two circles are the iris, in any color you like, and the pupil, in black. I used fleece, but you can use felt, or old T-shirts, or anything you have lying around, socks, washcloths...whatever you like, as long as it is soft enough to wear, if you plan to wear it against your face. You'll need a small wad of stuffing, some strong thread (I used upholstery thread, but you can just double your thread up), a needle, and embroidery floss to match your eye color and your pupil (black), and some white floss for a highlight. You'll also need about 5 feet of 1/4 inch ribbon, if you want to tie the eyeball to your head. A short length of ribbon works if you want to tie it to your finger as a ring.

Start by sewing a running stitch, just in and out, about 1/4 inch in from the edge of your white circle, pulling your thread a little a you go around.
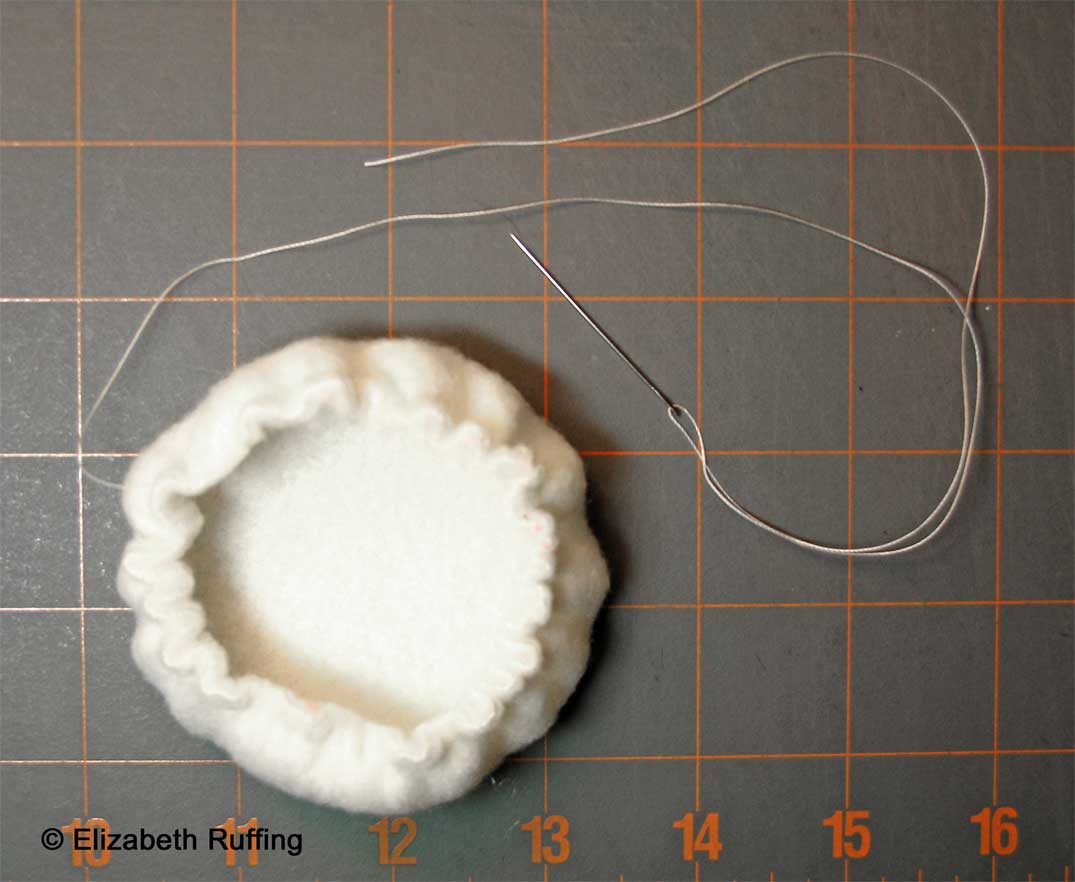
You're gathering the edge as you sew around the circle.
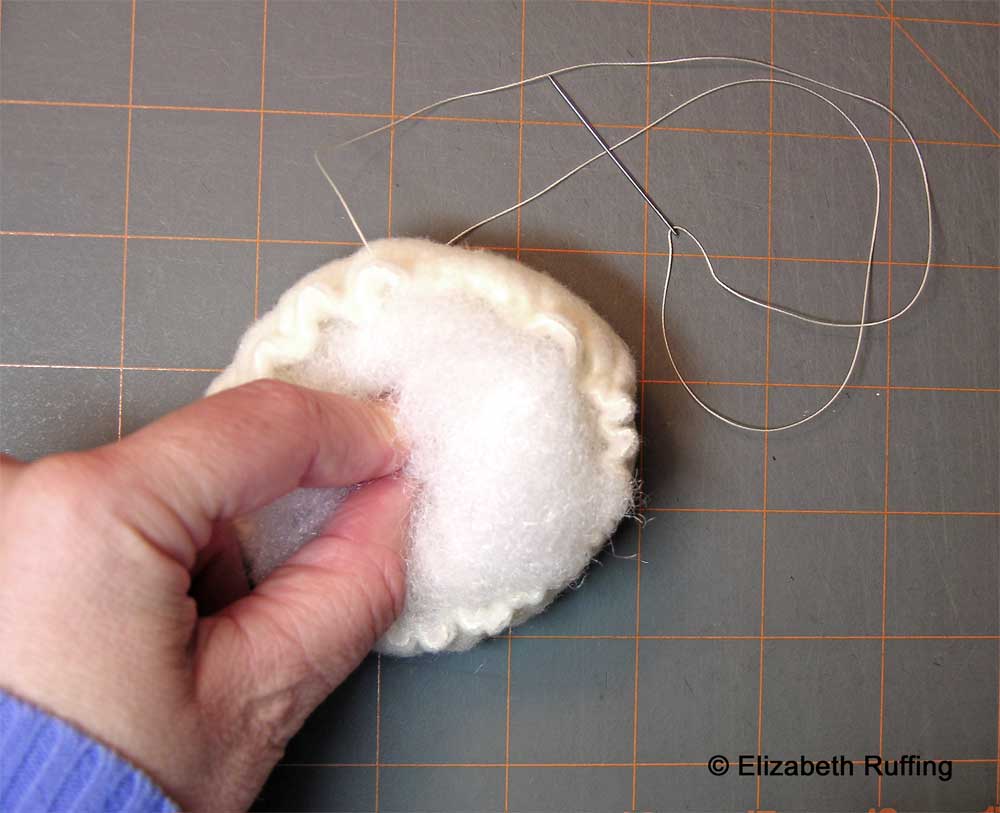
It will make a cup. Poke your wad of stuffing in the middle, and tug your thread some more.

Pull it as tight as you can without breaking it. It helps to keep sewing around the circle, picking up the edges of the circle as you go, and pulling the thread. Once you have it gathered as much as you can, knot your thread and cut the end.
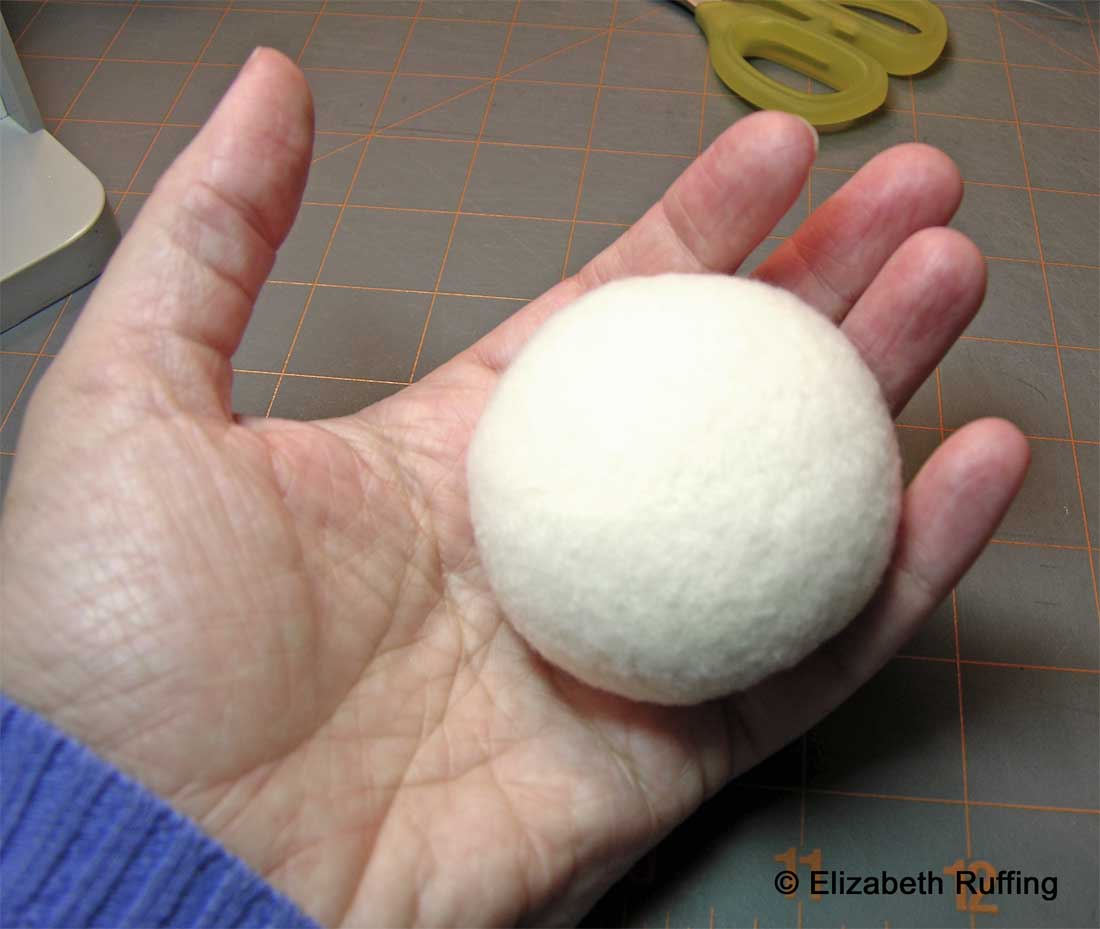
Now you have an eyeball. Time to attach the iris.
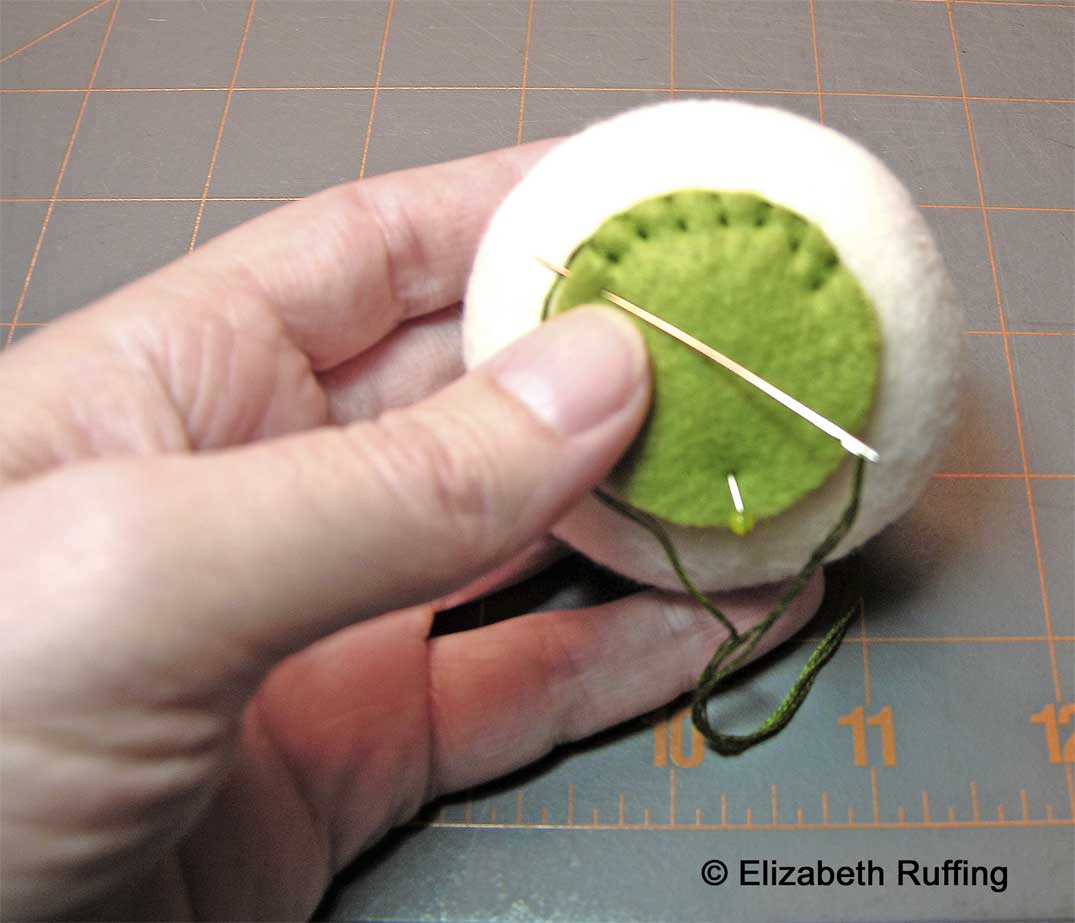
Pin the iris on wherever you like, right in the middle if you want your eye to stare straight out. Sew a blanket stitch around the edge, using your floss. I have a step-by-step tutorial for the blanket stitch here.
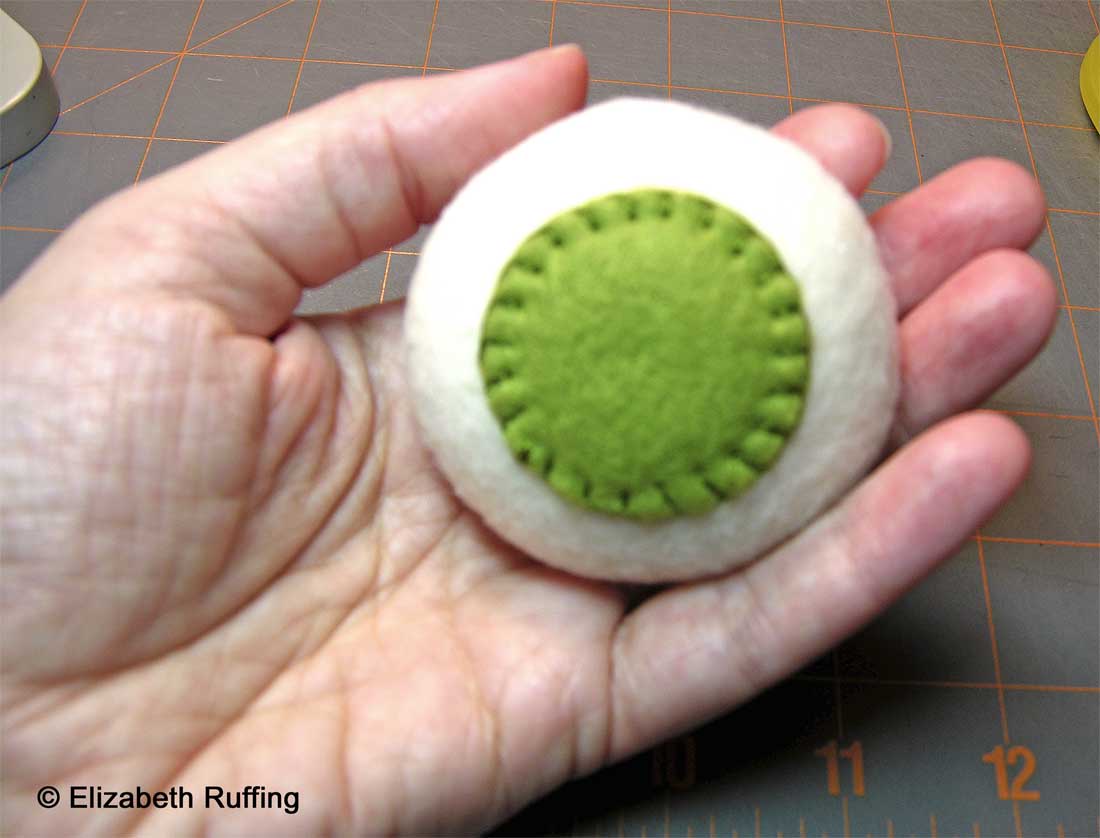
Knot the end once you've gone all the way around, and pull it under the edge of the iris, and out the top of the iris with your needle, to hide the knot. Cut the end of the floss.
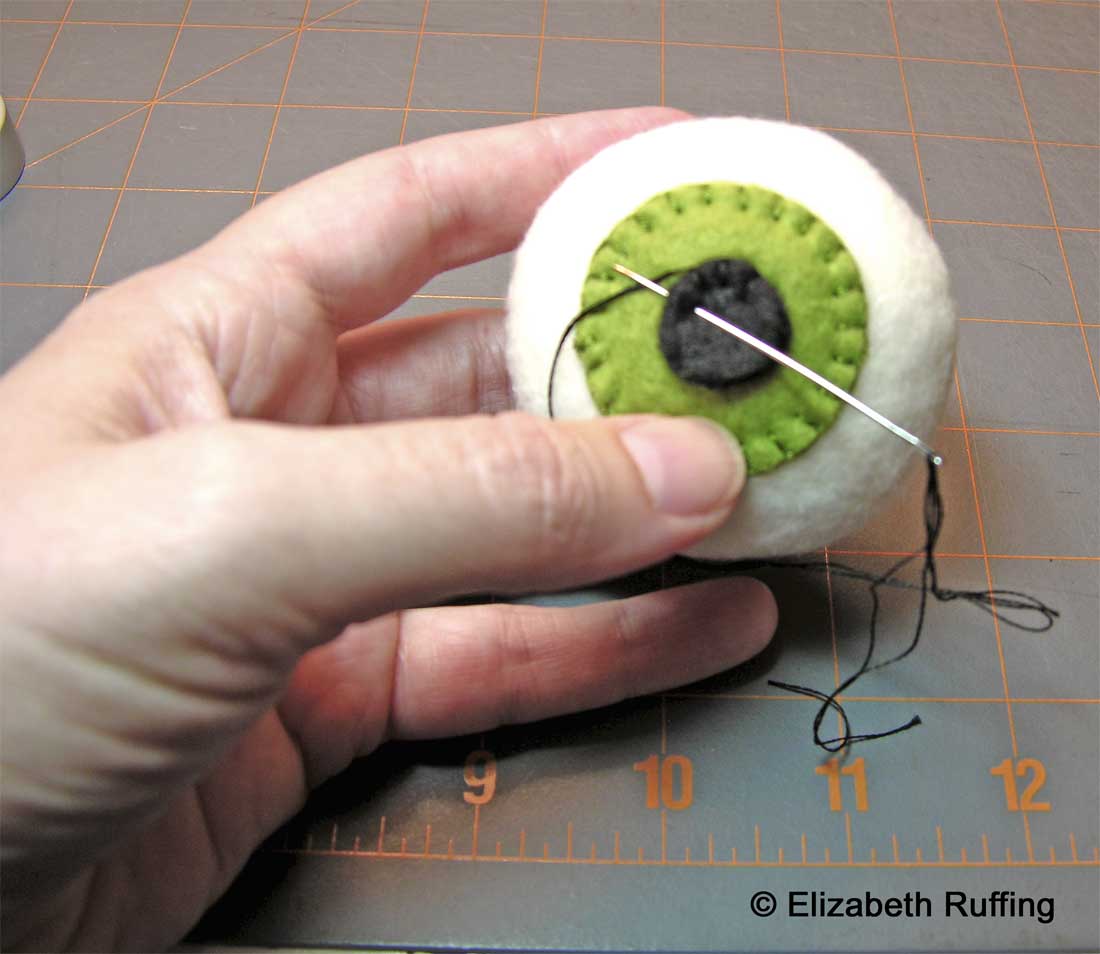
Lay your pupil on top of the iris, in the middle if you want it to stare straight out, and attach it with a blanket stitch using your black floss. Knot the end, pull the knot under the edge of the pupil, and out the top to hide the knot. Cut the end of the floss.
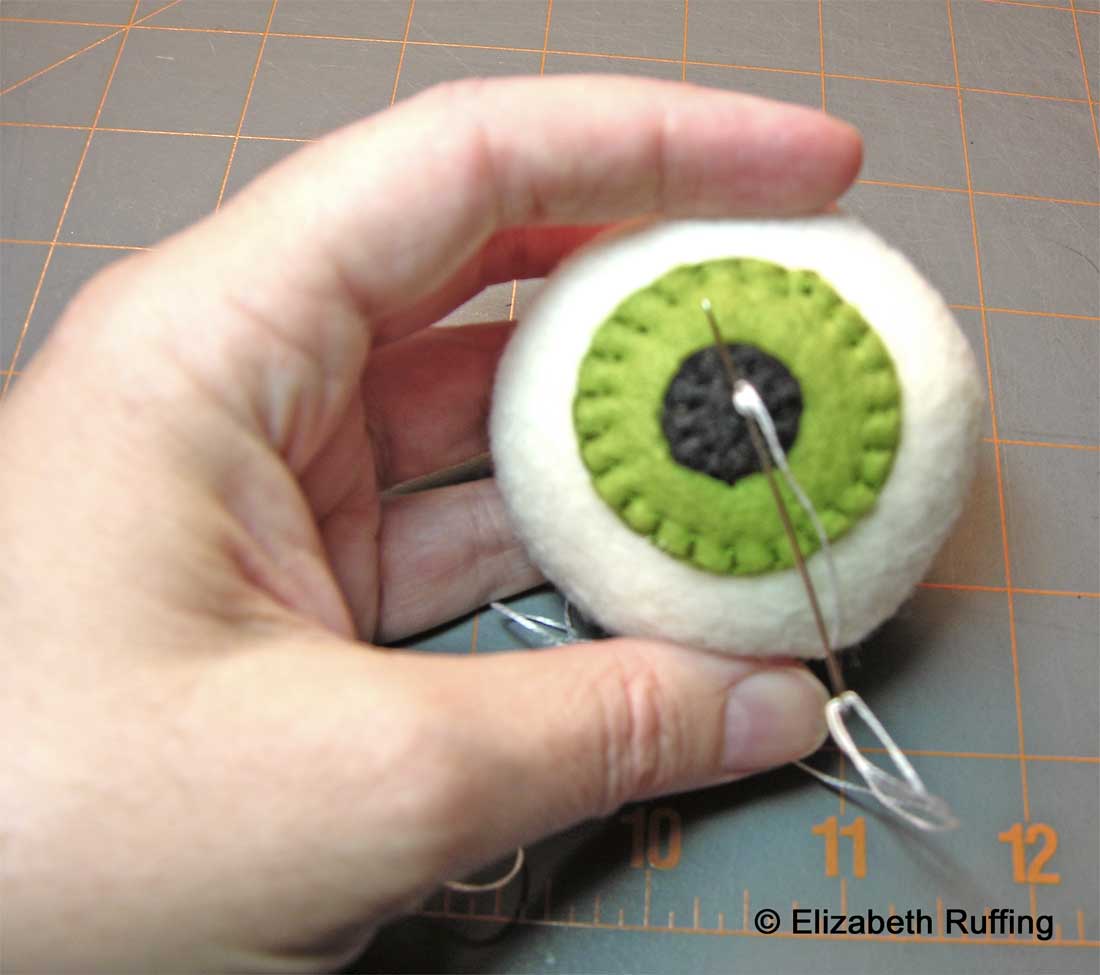
Take the white floss, enter from under the edge of the iris, and come out on top of the pupil. Take a few stitches to create a highlight for your eye. This is really the same as taking a few satin stitches. You can see my tutorial for a satin stitch here. Then poke your needle back in and under the iris, and out under the edge of it, to hide the end of your floss. Cut the end of your floss.

There's your eyeball.

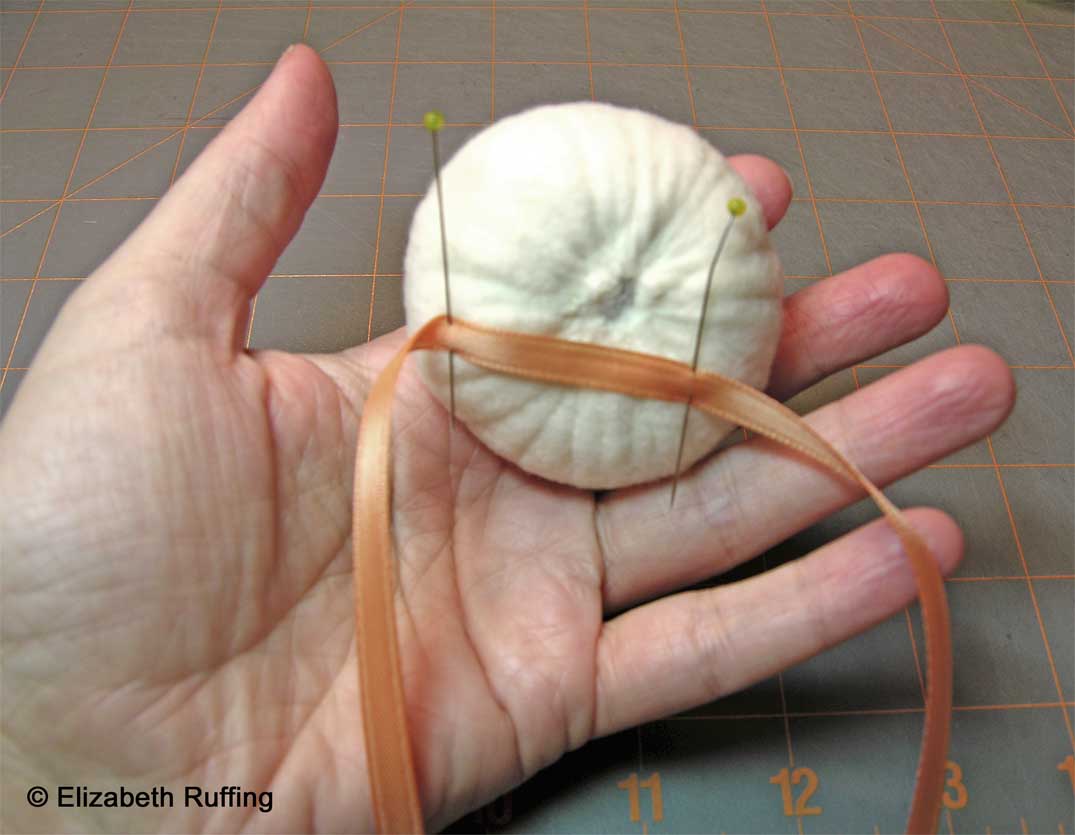
I attached a ribbon to the back of mine, trying it on first to see where I wanted the ribbon. Just hand sew it on to the back and your all set. I still like the idea of pinning it to a sweater like a brooch.

Labels: ,

8.29.2008

Then the light bulb came on

I traced my drawing, preparing to transfer it to my canvas with transfer paper, when I got an idea! Why not just print my drawing right on my canvas with a digital printer! Why didn't I think of that in the first place?

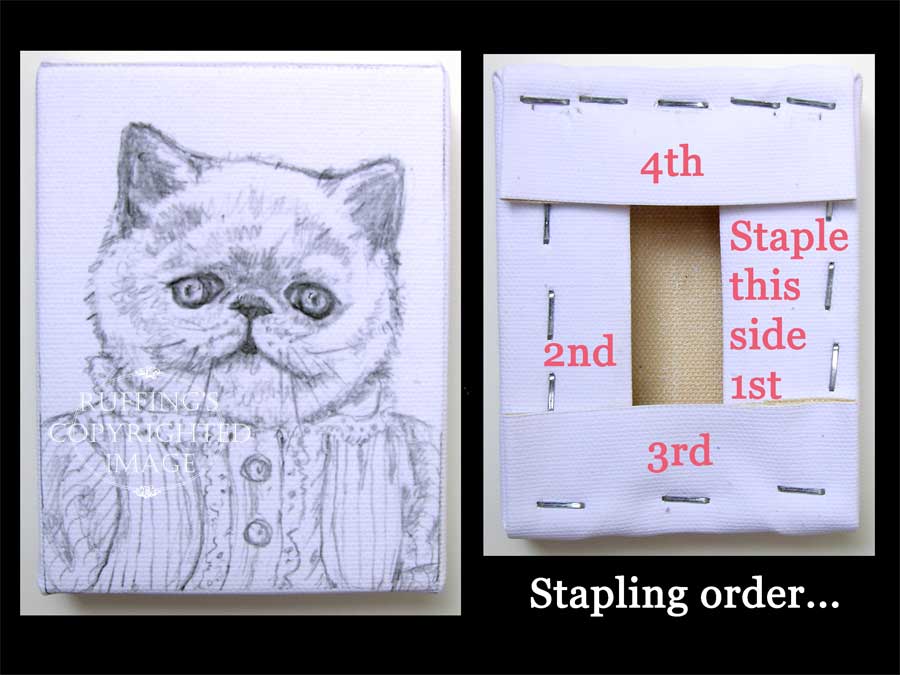
Here is the stapling order, which is in the video, in case it goes by too fast, or you want to click on the photo to get a bigger picture.

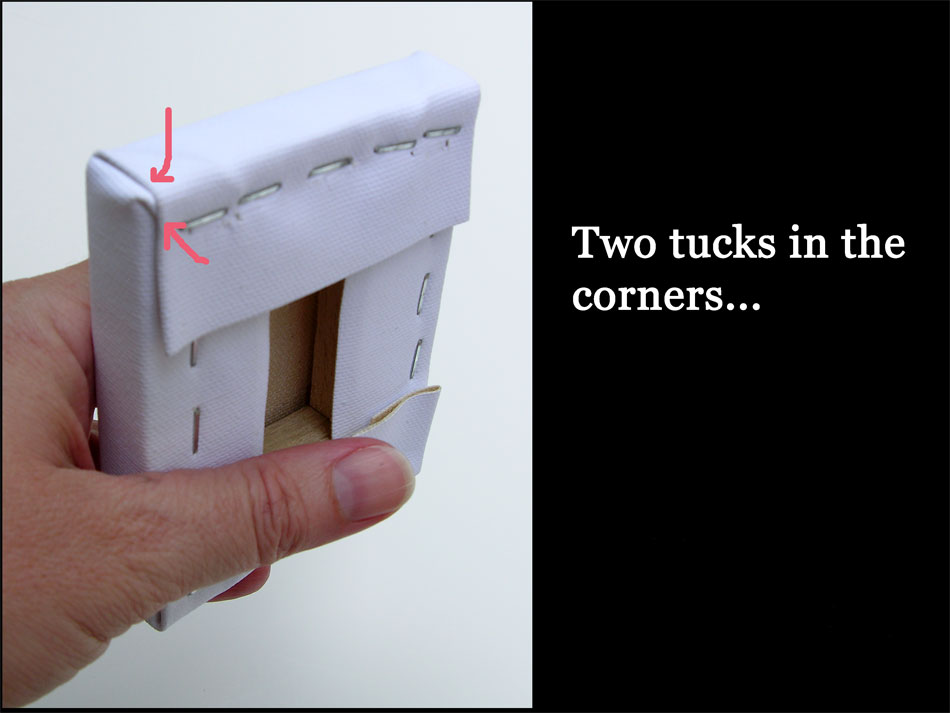
And here is a photo of the two tucks in the corners that you make when you do a gallery wrap, which means the staples are around the back instead of on the sides. Again, you can click on the photo to make it bigger.

So much easier!

Labels: , , ,

4.29.2008

Forging ahead in the face of uncertainty...Transferring

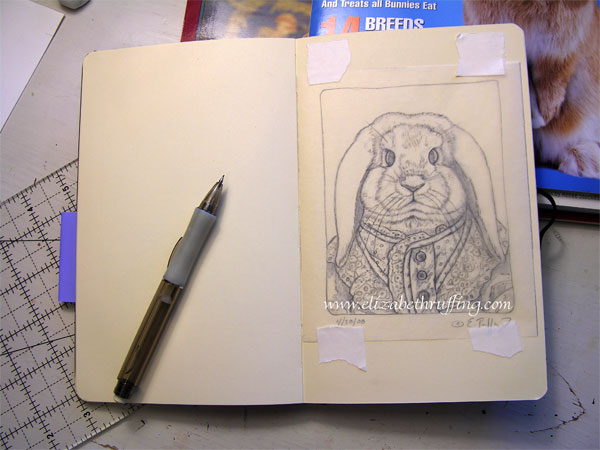
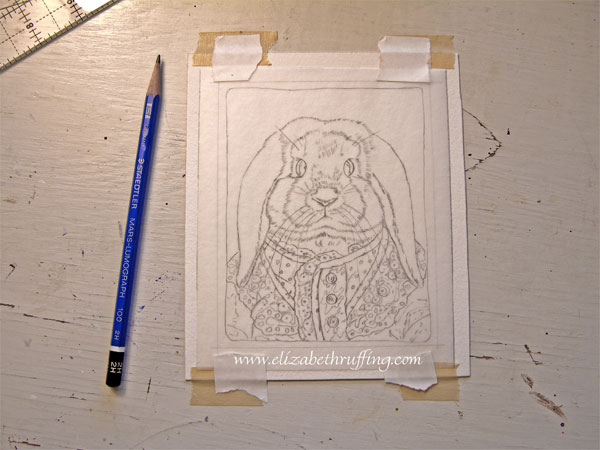
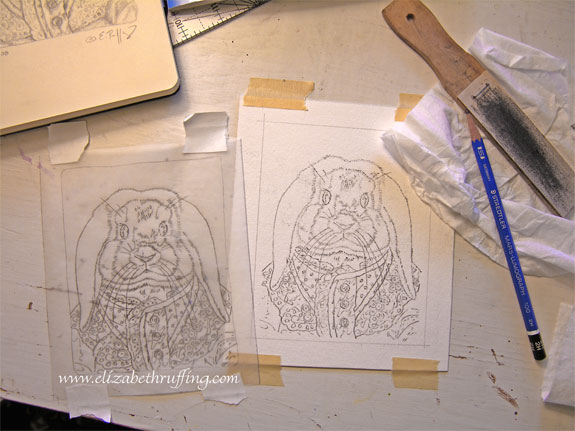
Moving on...This a quick rundown on transferring a drawing to watercolor paper (or a surface of your choice). The first step is to cut a piece of tracing paper slightly larger than your original drawing, and tape it over the original drawing. I'm using Scotch 3M Safe-Release tape (the white kind you find in art and craft stores) so it won't disturb the surface of my sketchbook when I remove the tracing paper. There are different kinds of artist tapes, that don't leave residue, for different surfaces. I use a mechanical pencil to outline the main areas of my drawing onto the tracing paper. I use solid pencil lines to represent areas where I will want to paint a hard edge (like the outer edge of the head), and dotted lines where I will want to paint a soft shaded edge (like a shadow).

Once I have a tracing, I tape my watercolor paper to a firm surface, my work table in this case. I tape it down with Scotch Drafting Tape this time, for a more secure hold. I don't want it to slip. I tape my tracing in place over the watercolor paper using the Safe-Release. I can keep an eye on the tracing if it starts to move, and so it doesn't matter as much. To be more secure, you can use the drafting tape instead. I sharpen a hard pencil. I like to use a 2H. If it is too sharp or hard, it will cut the tracing paper. So experiment first for a good balance.
I slip a piece of transfer paper (I use Saral) between the tracing paper and the watercolor paper. You can use homemade graphite paper, if you wish. To make some, take a piece of tracing paper and a 2B pencil (the wide flat ones work best), and cover the paper with graphite. Once you've covered it, take a cotton ball with some rubbing alcohol on it, and rub it across the graphite-covered surface to even it. Let it dry and you've got your own transfer paper. Carefully trace your drawing with your hard pencil, avoiding leaning too hard on your drawing as you go. Putting an extra piece of paper under the ball or side of your hand is helpful so you don't make smudge marks through the papers with your hand.

When you've transferred all your lines, remove the tape from one corner of your tracing and double check that you've gotten all the lines transferred. Once everything looks fine, remove the tape and the graphite paper. Don't slide it any more than you need to. Lifting it up makes fewer smudges. You will have some smudges anyway.

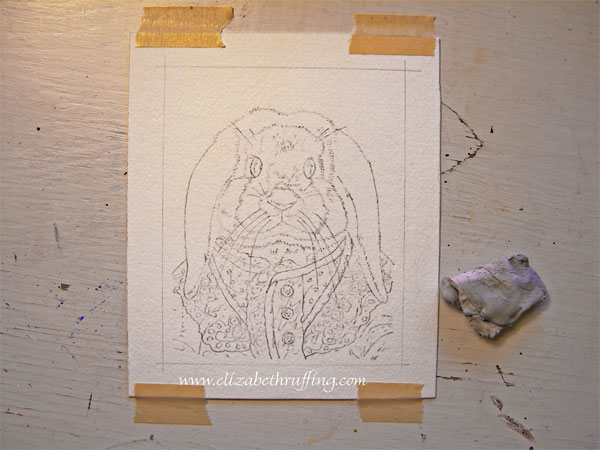
Take a clean kneaded eraser and press and release the eraser on the watercolor paper, gently lifting the excess graphite off. This is how you get the smudges off, but you also want lighten your lines, if necessary, leaving only faint lines to paint by. Some watercolor colors will lock the graphite lines in place and you won't be able to erase them. So, it is best to work with the faintest lines with which you can stand to work. Knead your eraser frequently to avoid putting the smudges back onto your paper. Kneading it keeps it "clean" (at some point, it will become too full of graphite and you will need to get a new eraser).

That's about it. If you are transferring to canvas, you will want to secure your tracing to it with canvas tape (tape for use with canvas), because the others won't hold. If you have canvas on stretcher bars, you will want to put a book or some other filler under the canvas to keep it rigid while you transfer your lines.

Labels: ,

1.14.2008

Stitch-along, Bluebird Quilt Block Part 3, Satin Stitch

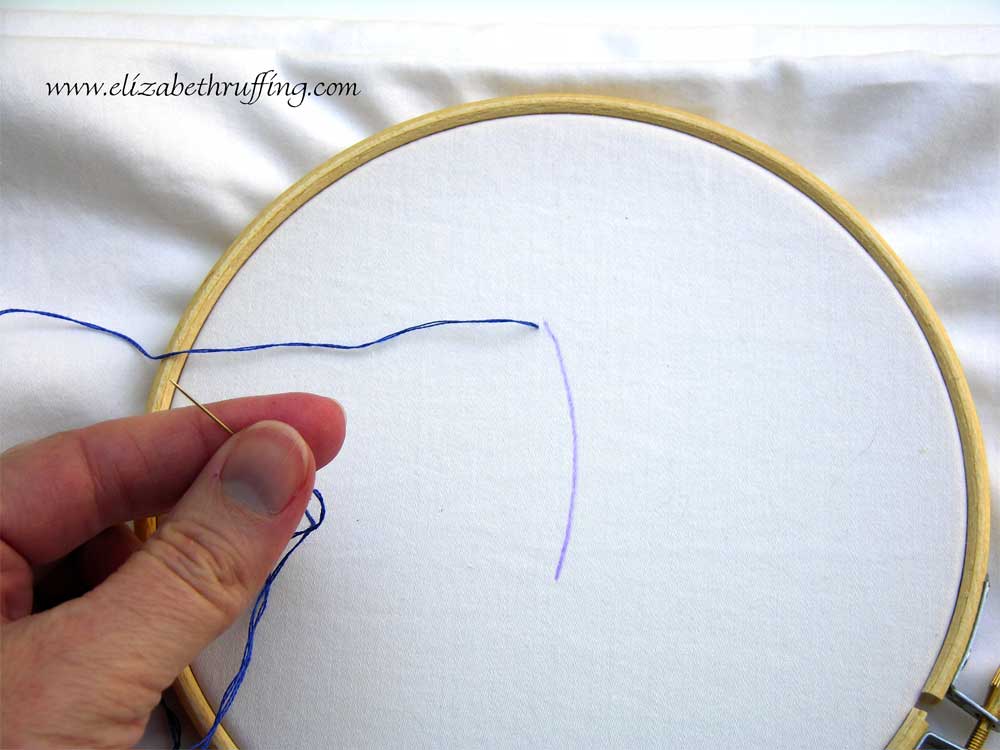
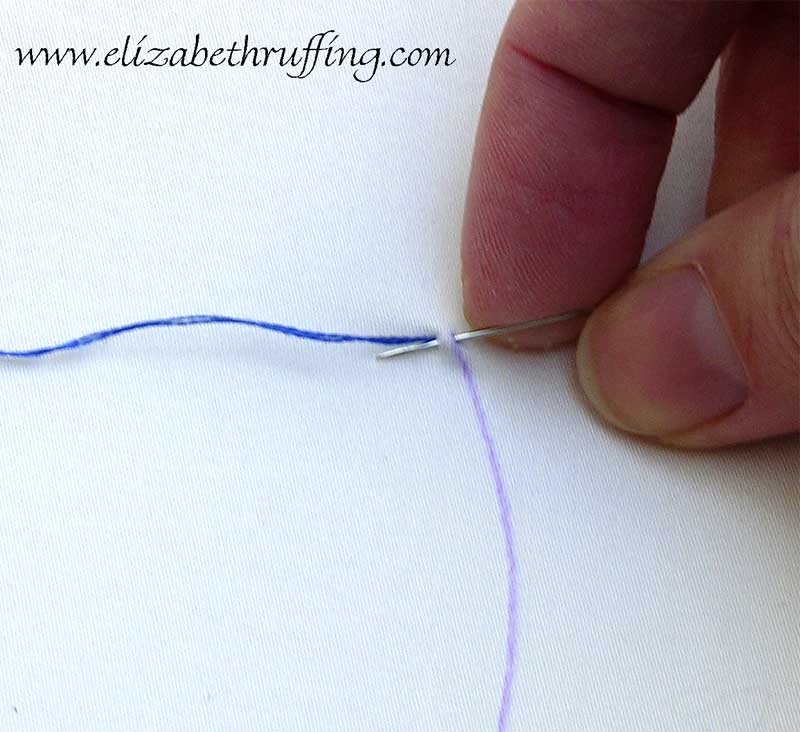
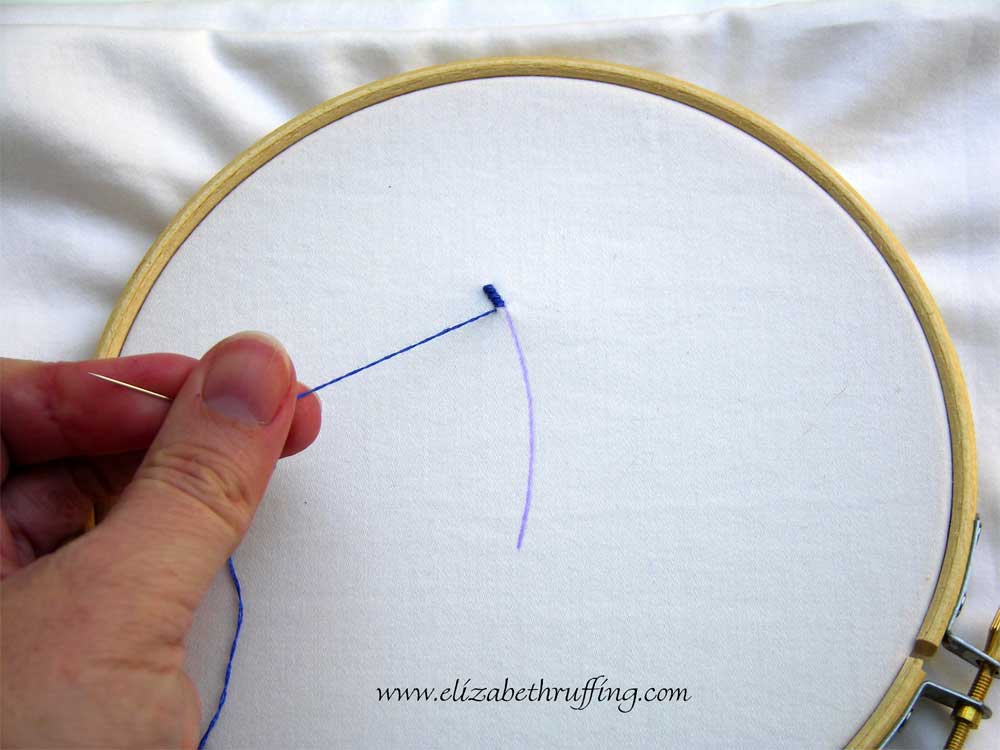
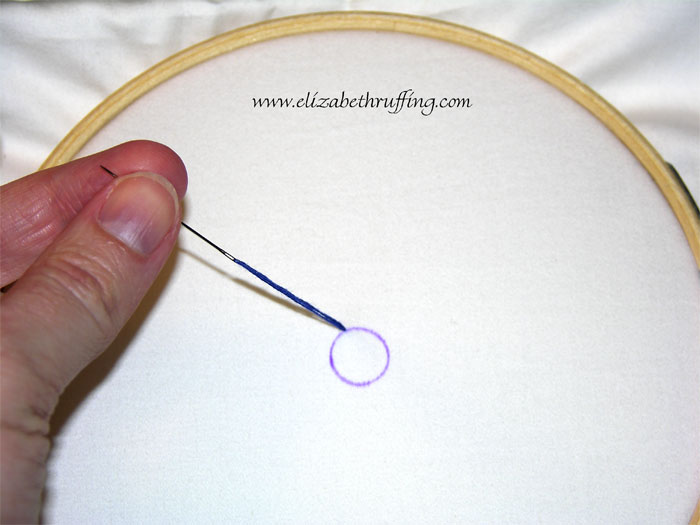
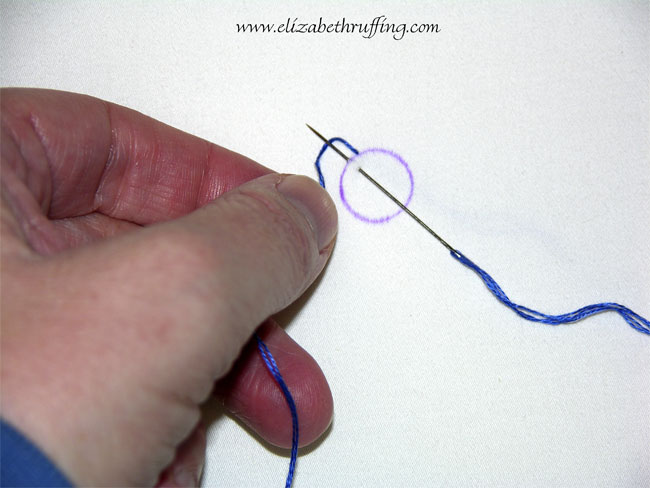
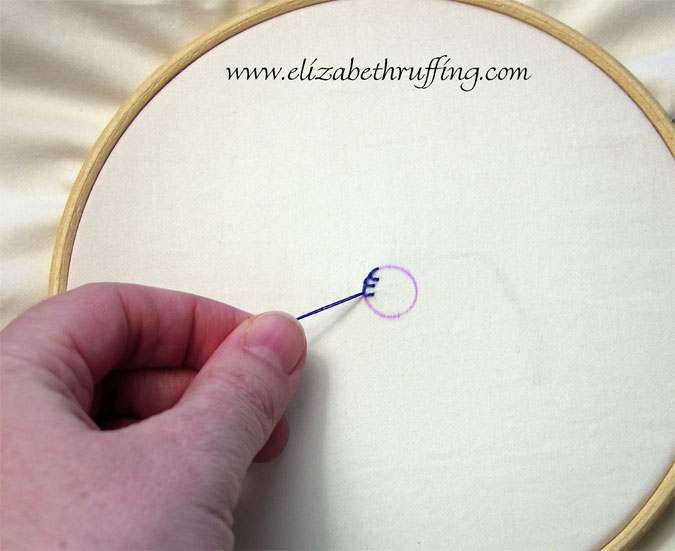
Back to the bluebird block...I finished embroidering the raw edges of the branch using the blanket stitch. I experimented with an alternate stitch, but liked the blanket stitch better. For the rest of my raw edges, for the most part, I used a satin stitch. The satin stitch was pretty easy and it looked very nice. Just a rundown on the basic steps first...Poke your threaded needle through your fabric from the wrong/back side to the right/front side of the fabric, just to the inside of your raw edge. I'm using a purple line in my photos to represent the actual edge of your appliqué. (You can click my photos to make them larger.)

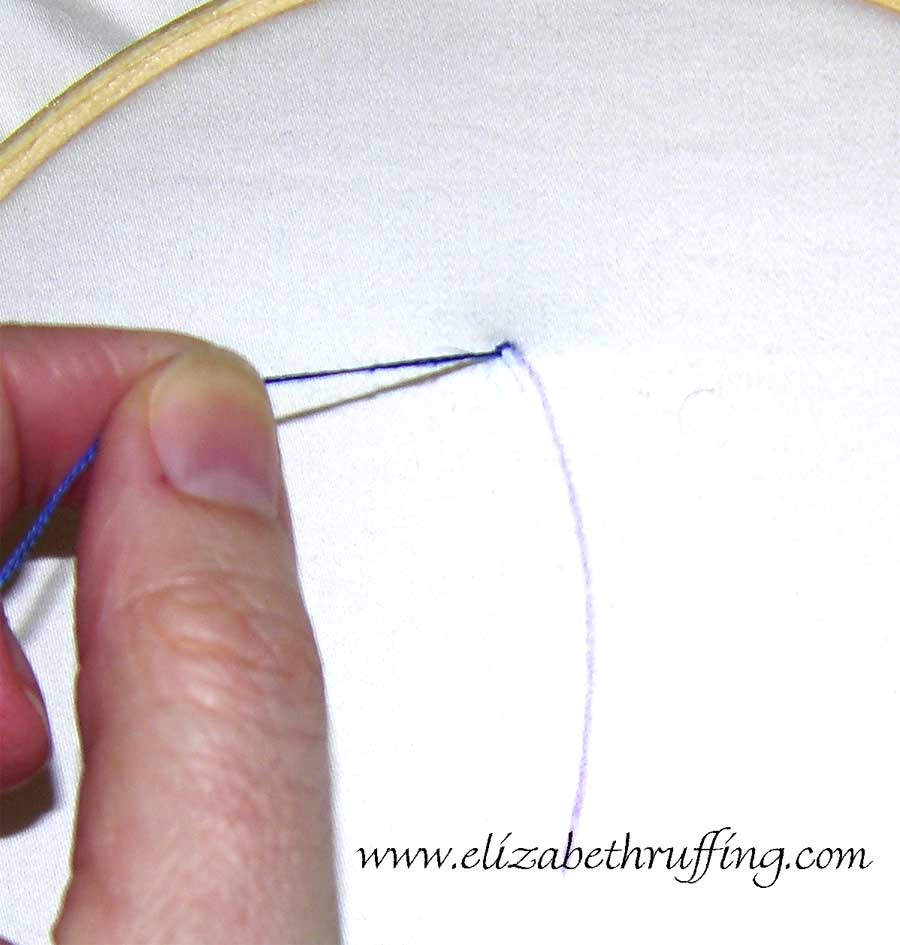
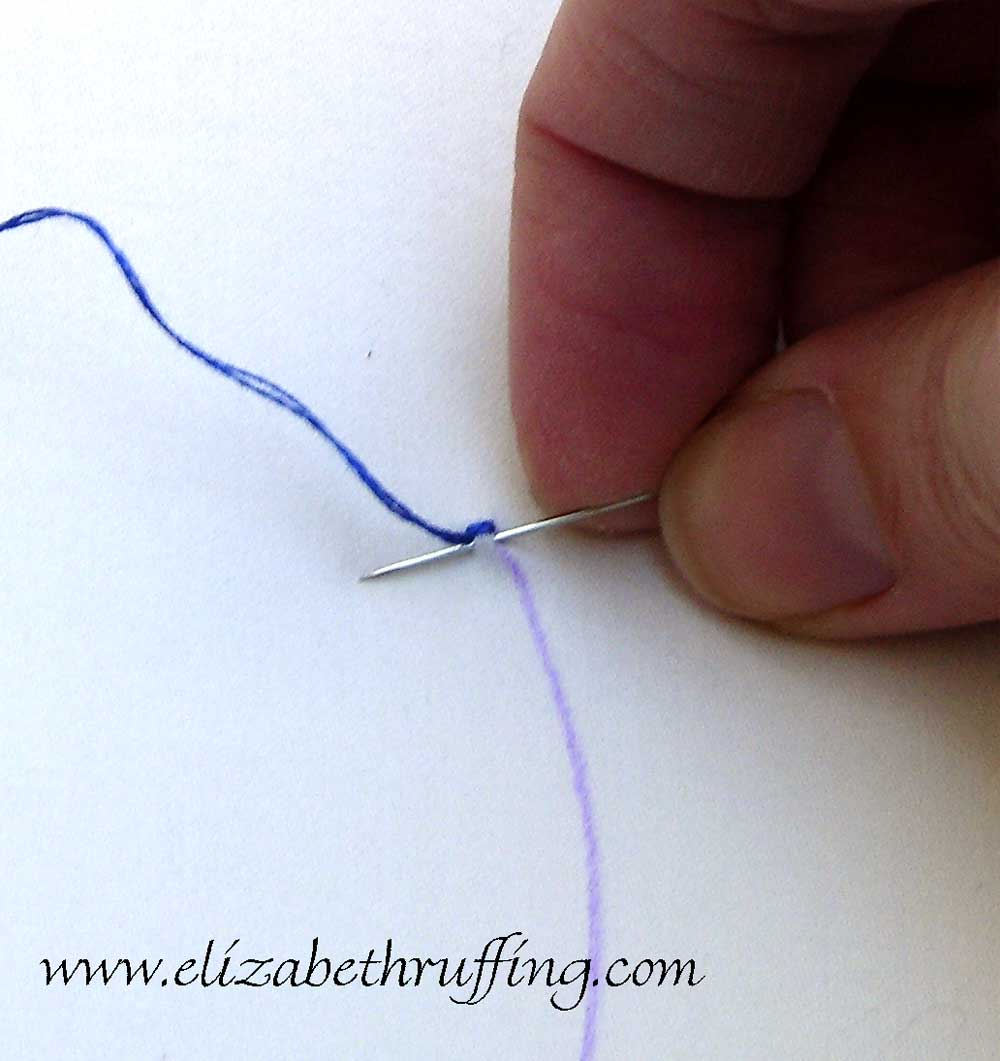
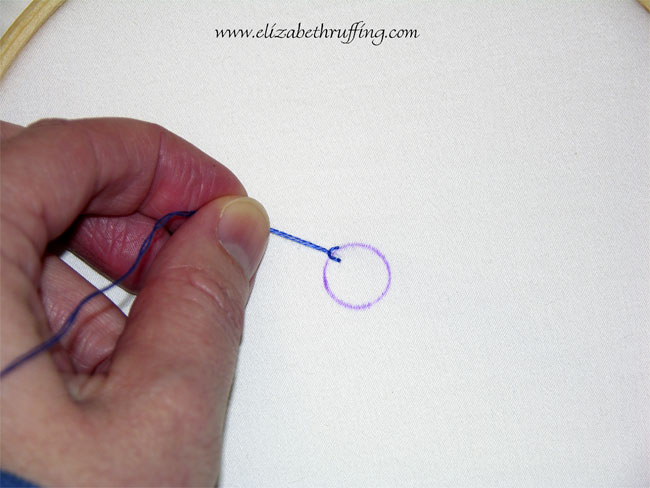
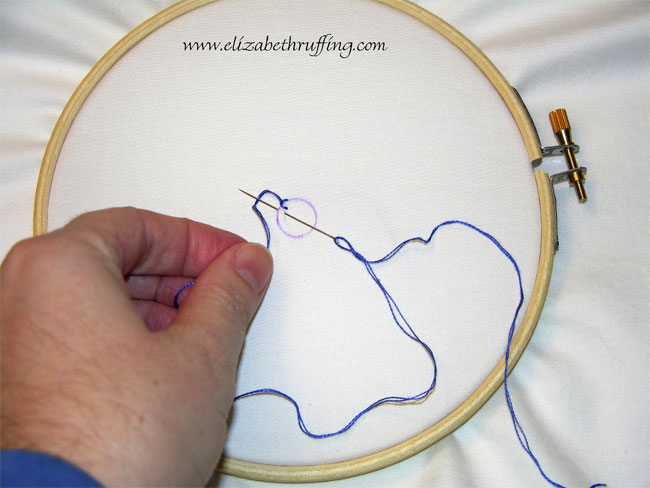
On the right/front side of your fabric, poke your needle through to the back of your fabric along your raw edge, and, in one movement, back out to the front of your fabric, just inside the raw edge, and just next to the point where your first stitch emerged.

Pull your stitch gently taut without making it tight enough so that your fabric puckers. You will be repeating these basic steps over and over along your edge to finish your raw edge.

Take your next stitch just under your first stitch as you repeat the same steps.

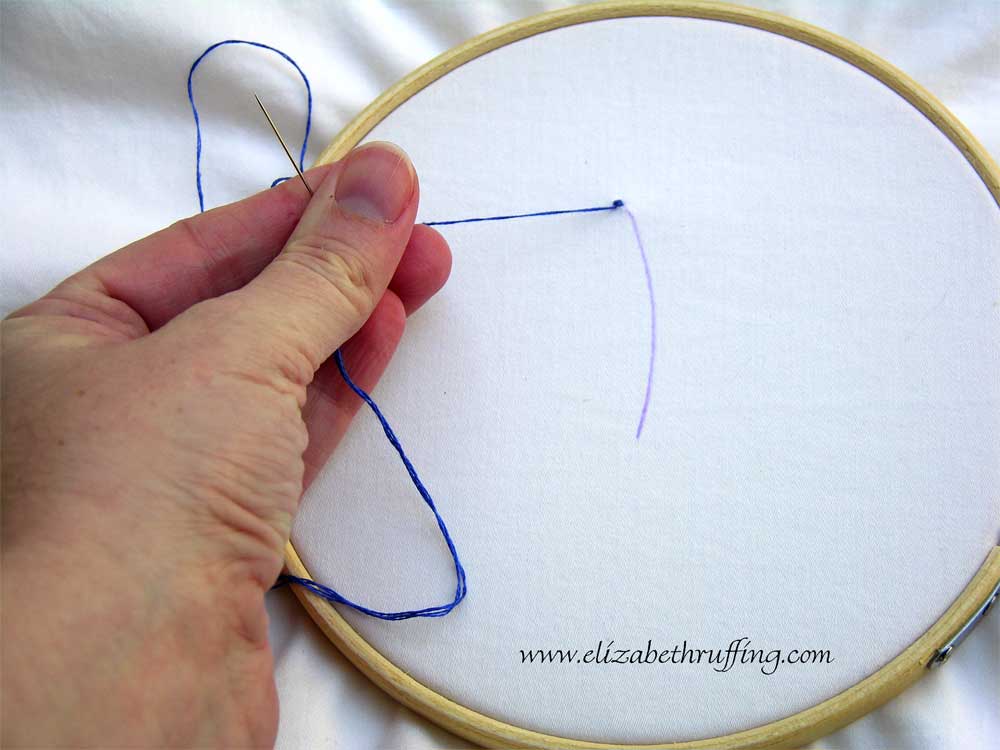
Keep an even tension on your stitches by pulling your floss gently.

Continue along your raw edge until you have reached the end of the shape you are working on. You will switch colors of embroidery floss depending on the color of your appliqué shapes. Again, I made a little knot in the back when I ended a color or ran out of floss on my needle. Since the block will be quilted, it shouldn't matter too much.

You will need:
  • Assorted colors of embroidery floss depending on your fabric choices (I used DMC black/310, white, 168, 260, 317, 370, 392, 646, 726, 742, 783, 797, 826, and 842)
  • An embroidery needle (I think mine was a size 10)
  • A hoop (I used a 9 inch wooden hoop for an 11 1/2 square of fabric. If your square is smaller, you might want a smaller hoop.)
Following the edges of each colored shape, follow the basic satin stitch steps to finish each edge.

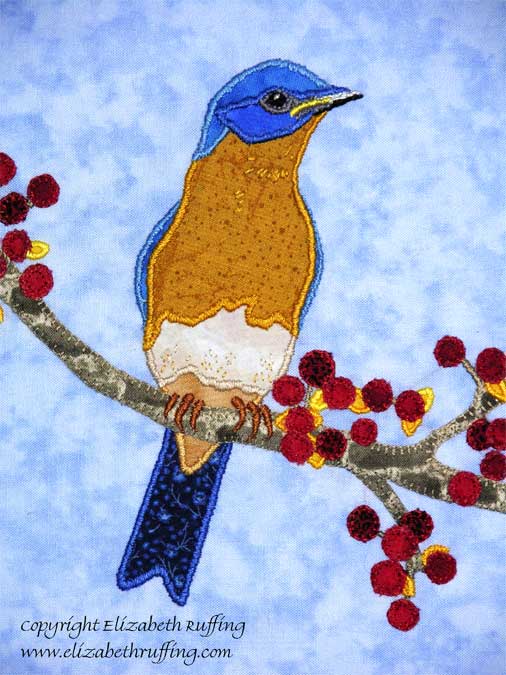
I took a few random stitches here and there just for effect, like on the bird's belly and chest.

I added a little white stitch in his eye for a highlight.

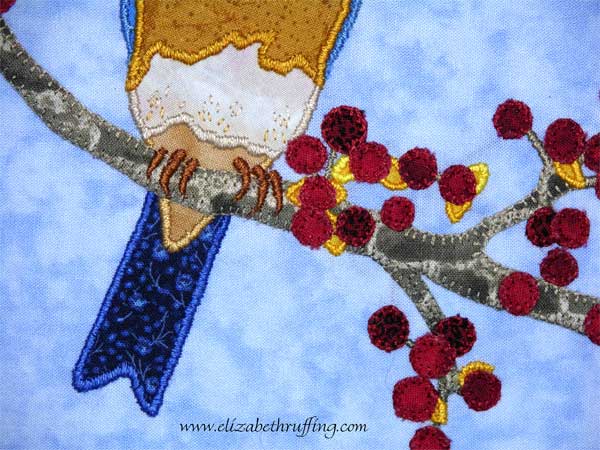
His claws are also done in a satin stitch. You can see the blanket stitch along the edges of the branch in this picture too. I tried using a lighter gray on the top of the branch, and a slightly darker gray along the lower edge of the branch. Where the branch got very narrow, I used a satin stitch right over my fabric because I felt it was too thin to hold up on its own.

That is about it for finishing the embellishment on this block. It will be trimmed down and squared off later when I set it into its destination. It's finished size will be 9 inches, which means it will be trimmed down to about 9 1/2 inches to include seam allowances. I will be careful not to cut through any of my embroidery stitching to make sure it doesn't come out later. But, we will wait to trim it for now. I am still debating over how I will use the block. We shall see...

Labels: , , ,

1.10.2008

Stitch-along, Bluebird Quilt Block Part 2, Blanket Stitch

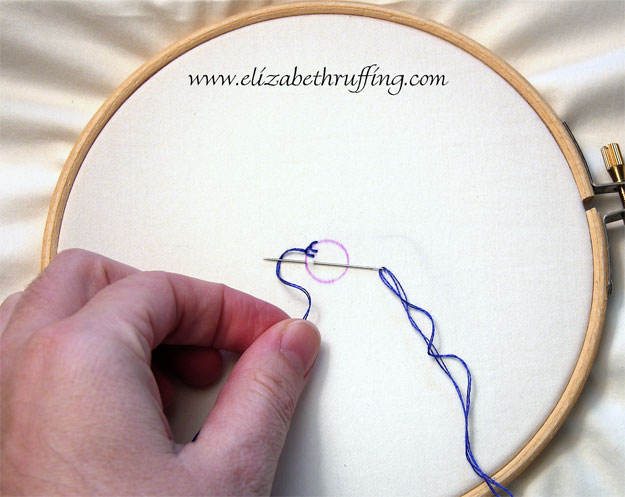
Okay, I'm back...We are about to start embellishing the bluebird quilt block with hand embroidery stitches. If you would prefer to use machine stitching, a zig zag or satin stitch along the raw edges of the appliqué will work fine, or you can try out the decorative stitches that might have come with your machine. I'm going to start with a hand-embroidered blanket stitch. Here are the basics of the blanket stitch before we start on the block itself. The first stitch is made by poking your needle through from the back of the fabric to the front of the fabric, along the raw edge you want to finish (shown here with a purple line).

The second stitch is made by taking a stitch from the front to the back of the fabric, just to the side of your first stitch, but inside the raw edge you want to finish. In one movement, poke the needle back out to the front of the fabric, along your raw edge, just next to the first stitch, while holding the embroidery floss from your first stitch down so your needle will be on top of the loop of embroidery floss from the last stitch. (You can click on my pictures to make them larger, for anyone who might not know that already.)

Pull your embroidery floss taut, not too tight to make the fabric pucker, but just enough that the stitch is smooth. It helps to smooth it with your finger as you go. These are the essential steps. You will just keep repeating them along your raw edge.

Poke your needle in and out of your fabric again, coming our on top of the last loop of floss. Keep your stitches an even distance apart. When stitching around a circle, point your needle from the middle centerpoint of the circle outward to make the stitches fan out nicely.

Pull them taut as you go.

Repeat the same stitch.

Pull it taut, and continue all the way around. You will take one little stitch almost in place to lock it down when you reach your starting point again. Then you will carry your floss along the wrong side (back) of the fabric to the next raw edge you want to finish, or you will take a backstitch on the back of the fabric and cut the floss to end it. I make a little knot just to be safe. Since this block will be quilted and it will have batting behind of it, it doesn't need to lie perfectly flat.

Okay...onto the bluebird block. Once again, you will need a few things:

  • A hoop (I used a 9 inch wooden embroidery hoop, but you may need a smaller one if your square is smaller than mine, which was 11 1/2 inches)
  • Embroidery floss (I used DMC 3777, but you will match your floss to the red of your berries)
  • An embroidery needle (I think I used a size 10)

Put your quilt block in your hoop, keeping the fabric taut, and tighten the screw on the side of the hoop to make it snug. Cut a length of embroidery floss about 20 inches long and separate out two strands of floss from the rest. Thread your needle with the two strands. A needle threader helps, but I just wet the ends with my tongue and cut them at a slant to make threading easier.

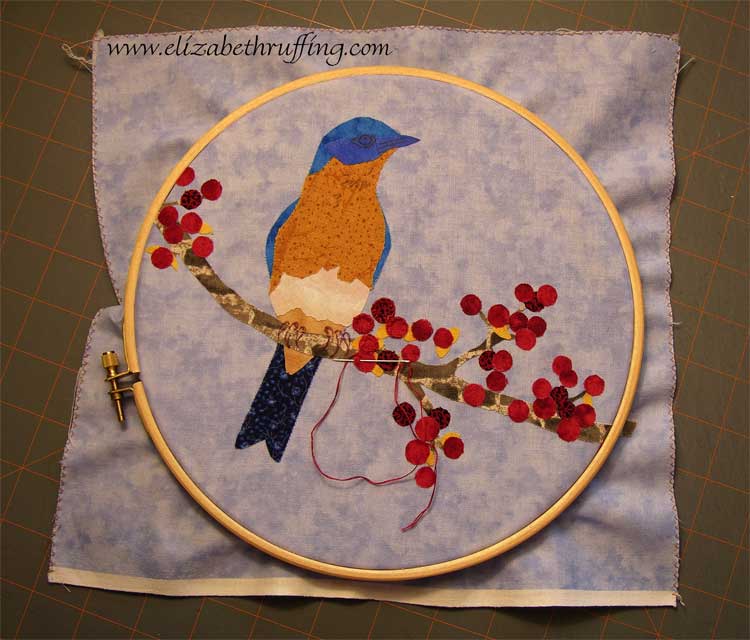
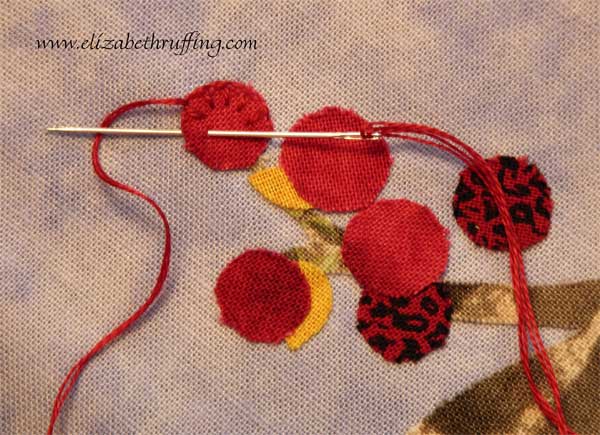
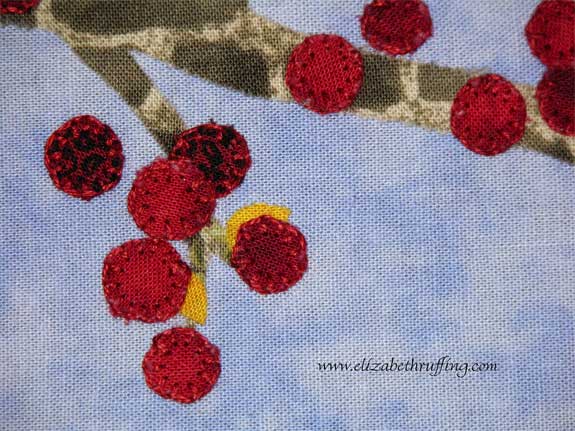
Pick a berry and start your blanket stitch as described above. Take a little lock stitch almost in place as you reach your starting point and carry the floss along the back of your fabric to the next berry. Repeat the process, ending and starting a new thread as you run out. I tried to work in clusters so I didn't have to make my floss travel too far across the back. I used the blanket stitch on all the red berries.

My fabric appliqués lifted for the wear, and so I steam pressed them down again when I was done, following the manufacturer's instructions for my paper-backed fusible.

Here's a closeup of my blanket stitch. I found I got a little better at it as I went along. It would probably be possible to use this stitch on most of the raw edges, if you wanted to, but I think I will experiment with another stitch for the next area I do. More later...

Labels: , , ,

1.05.2008

Happy new year! Stitch-along anyone?

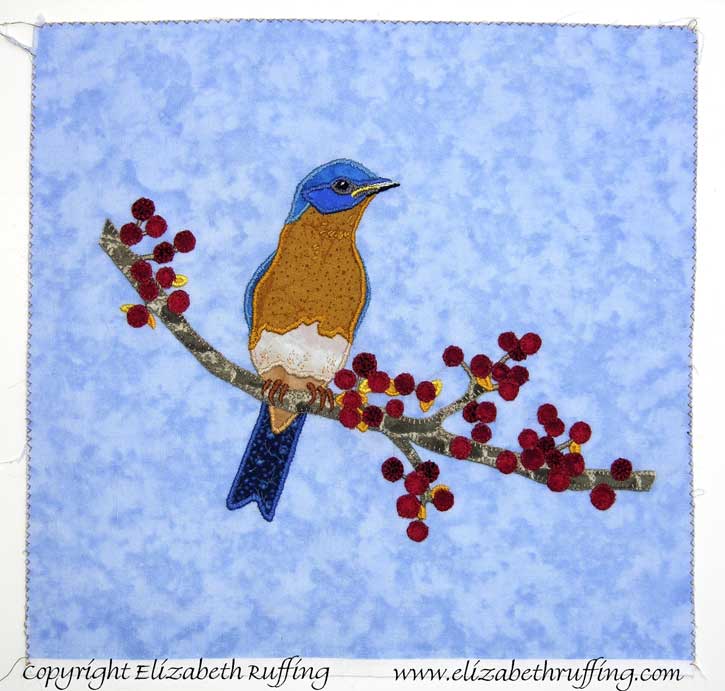
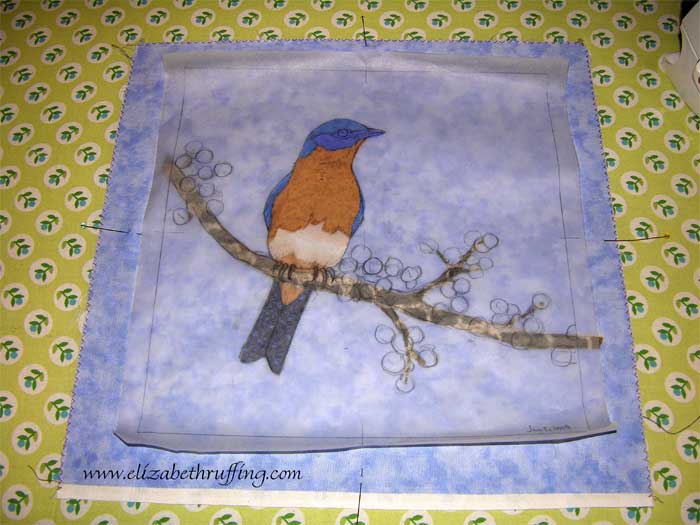
I haven't yet finished my quilt block-of-the-month homework from this past year, or the year before, or maybe any year, but...I have just started two more classes. One is an appliqué class, and the first block is a bluebird. I was fiddling and couldn't stop myself. I redesigned the whole block. Then I thought it might be a nice thing to share since I could show some raw edge appliqué in action, and then I could embellish my design with hand embroidery, which I am determined to learn. So...if you would like to stitch along with me, please download and print the PDF for my design. You will need to download Adobe Reader, if you don't already have it. It is a nine inch square design, which won't fit on 8 1/2 by 11 inch paper. So, you will use the center marks on the design for placement.

Please note this is my original drawing and it is copyrighted. In this instance, I am allowing copies to be made for personal use only. Selling my design or making items to sell from my design is not allowed, but you may make the design up to keep for yourself or to give to friends or whomever you like. Please credit me with the design if you publish your version of my design anywhere.

Okay...First of all, you will need some things:
  • Tracing paper
  • Ruler
  • Pencil (I like the mechanical kind)
  • Paper-backed fusible web (I like Wonder-Under)
  • 10 inch square or larger of background fabric (I used a pale lavender-blue cotton quilting fabric, 11 1/2 square)
  • Assorted fabric scraps in navy, royal blue, rust, tan, cream, gray, and two reds (I used cotton quilting fabrics)
  • Optional embroidery tracing paper, or graphite paper and a hard pencil (I used a 2H pencil)
  • Optional disappearing ink pen, or permanent marker (I used a Pigma pen)

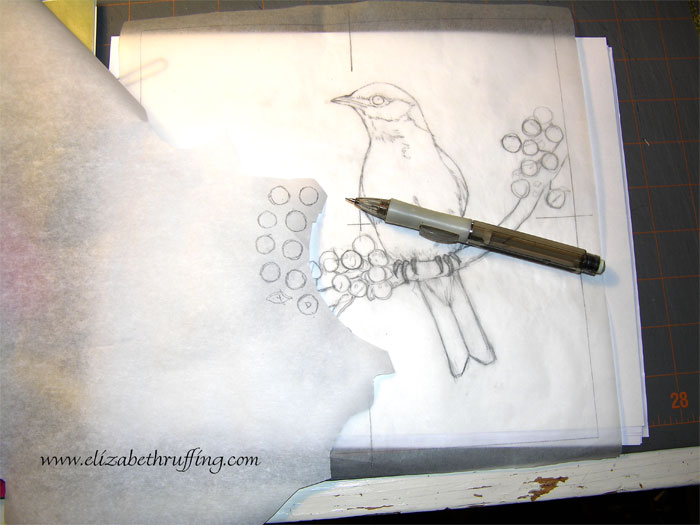
Cut a ten inch square of tracing paper and draw a nine inch square on it. Mark the center on all four sides and mark the middle of the square with a cross. Match the center marks up with the center marks on my design and trace the design onto the tracing paper. You may simplify the design all you like. You'll be working from the tracing. Using the color picture at the top of this post as a guide, simplify the design into shapes by what color goes where.

Flip your tracing over to the reverse side. If you don't do this, your design will be facing the opposite direction when you are done.

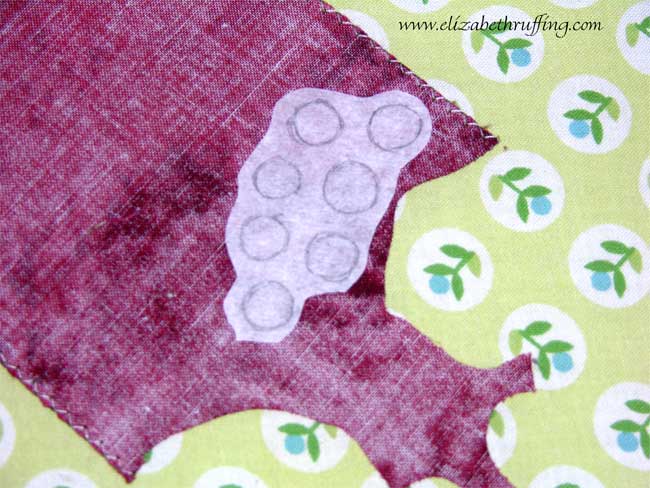
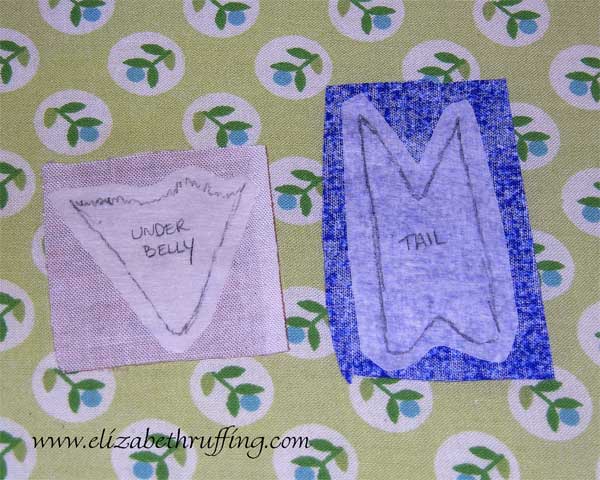
Lay your paper-backed fusible web over the tracing and draw the shapes for each color onto paper side of the fusible web. Give yourself about an extra eighth to a quarter of an inch of paper-backed fusible around each shape. (For anyone who might not already know this, you can click on the blog images to make them larger if you need to.)

Fuse your paper-backed fusible shapes onto the wrong side of each of your fabric scraps, by color, following the directions on the package. Allow them to cool.

For the berries and the branch, you will simply cut along your drawn lines, except for either end of your branch where you will need to leave some extra fabric. You will trim your block down to size after it is stitched. Leaving a little extra on the sides of your block is a precaution against the small amount of fabric that gets taking up from stitching.

For the bluebird, you will leave an underlap where the edge of one color meets the next. This means you will leave an extra eighth to a quarter of an inch of fabric where one piece slips under another. It isn't so important which piece goes under which. I started at the bottom of my bird, leaving a little extra at the top of each shape as I went up. So, the top of the tail, for instance, had a little extra fabric.

Where there is no underlap, you will cut along your pencil lines.

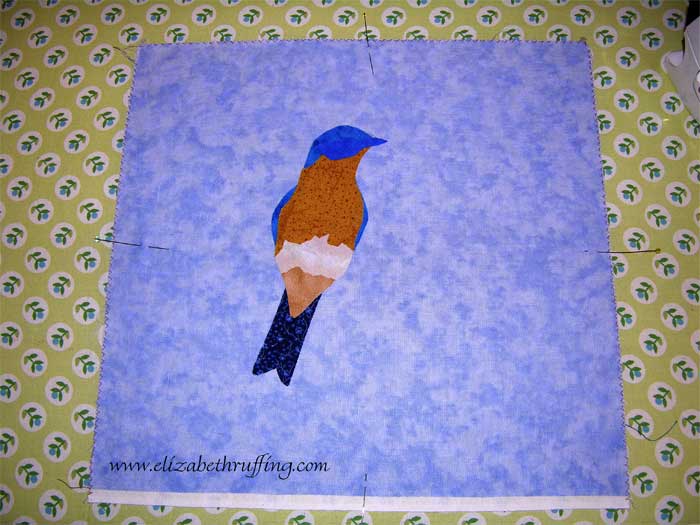
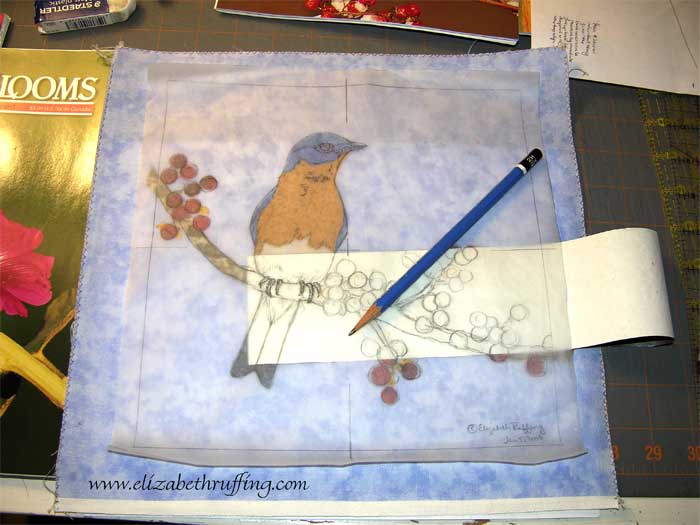
Peel the paper off the back of your shapes, and use the tracing as an overlay to help you arrange the pieces on your background fabric. Mark the centers of the sides of your background fabric so you can line up your tracing. I used pins to do this. Start with the bird, working from top to bottom, laying the tail down first. As you go, lay your tracing over the fabric to see that everything is arranged the right way.

Once your bird is in place, fuse according to your package directions.

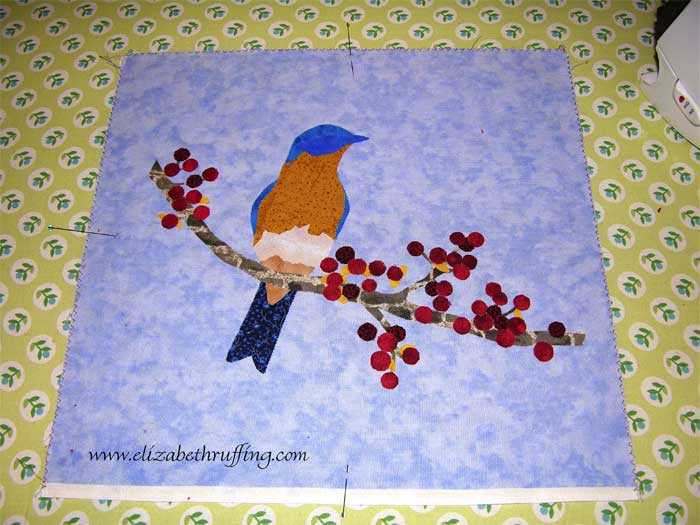
Next, lay the branch down and check its placement by putting your tracing over the fabric. Instead of following the center marks for placement now, you can just line up the drawing with your bird. It's easier.

Fuse your branch in place.

Lay down your red berries using the tracing as a guide as before and fuse them in place.

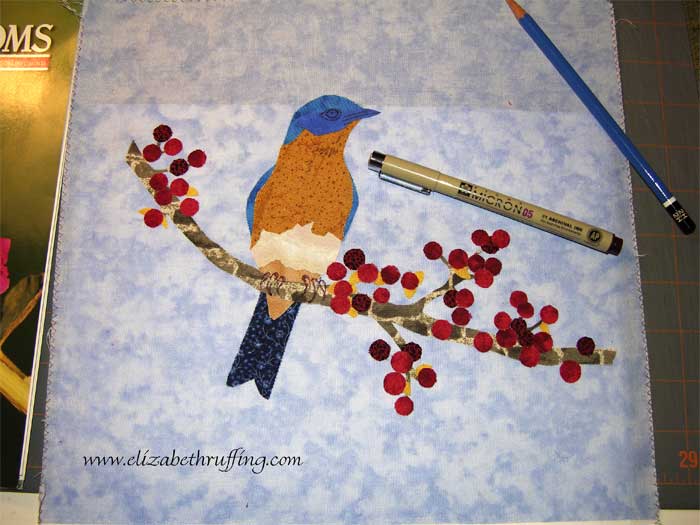
Using a hard pencil and a small piece of graphite paper, transfer the eyes and the claws of the bird onto your fabric. Instead of graphite paper, you can also draw on the back of your design and then flip your tracing to draw over the lines on the front. Or you can just "wing it" :) That's pretty much what I ended up doing.

I went over my pencil lines with a permanent marker so I could see them better. You don't have to do this. If you use a Pigma pen, be sure to let it dry for 24 hours before applying stream or getting it wet so it won't run.

Now you are ready to embellish the design with machine stitching or hand embroidery. Whew. We'll save that for another day.

Labels: , , ,